Latest Posts

Sticky Toffee Cake

I’ve been asked by a few people to share the recipe for the Sticky Toffee Cake that I made the other day, so here it is. It’s adapted from a cupcake recipe that I found in a book.

Ingredients

180g chopped dates

180ml boiling water

80g butter, softened

150g light brown sugar

2 large eggs

180g plain flour

1/2 teaspoon baking powder

1 teaspoon bicarbonate of soda

1 teaspoon vanilla extract

For the icing and decoration

300g butter, softened

400g icing sugar

200g tinned caramel

Pecans, chopped fudge or Scottish tablet and sprinkles

Method

1. Line two 8” round baking tins and preheat oven to 170°c fan.

2. Pour the boiling water over the dates and allow to soak for twenty minutes.

3. Cream the butter and sugar until pale and fluffy.

4. Add the eggs to the butter and sugar, one at a time, scraping down the sides frequently.

5. Sift the dry ingredients together and add them to the wet in three batches.

6. Add the vanilla to the dates and boiling water then add it all to the batter, folding in by hand until all evenly distributed.

7. Split the mixture between the two tins and bake for 25 mins or until a skewer comes out clean. After five minutes, turn them out to cool on a rack.

8. Make the buttercream by slowly adding the icing sugar to the soft butter then add 100g of the tinned caramel.

9. Assemble by spreading buttercream on one of the cakes, making a slight lip near the edges, then spread most of the remaining caramel on top of that layer of buttercream, being careful to keep within the lip edge. Place the other cake on top, and cover the top and sides with icing.

10. Squiggle the remaining caramel sauce on the top of the cake then put the remaining icing in a piping bag and pipe shells, roses or a rope around the top of the cake. Sprinkle with pecans and any other decorations that you fancy.

Rhubarb Meringue Pie

DSC_0790

I have dreamt of baking a tart like this for years. I love lemon meringue pie, especially the individual ones made by Cottonrake, my favourite bakery in Glasgow. But I have a passion for rhubarb, especially the bright pink, early forced rhubarb. By the time I got round to making the tart for the blog the forced stuff was all over and giant green and pink stalks were all that the shops (and my garden) had to offer. But no matter…

DSC_0729

So this recipe is a pulling together of different recipes to make one finished pie. The pastry is adapted from one handed down to me. The rhubarb curd is from https://vikalinka.com/rhubarb-curd/ and the Italian meringue is simply a staple recipe that I make and is pretty standard. A bonus for me is that here is no egg waste: you need three egg whites for the meringue and three egg yolks for the pastry (and the curd uses whole eggs.)

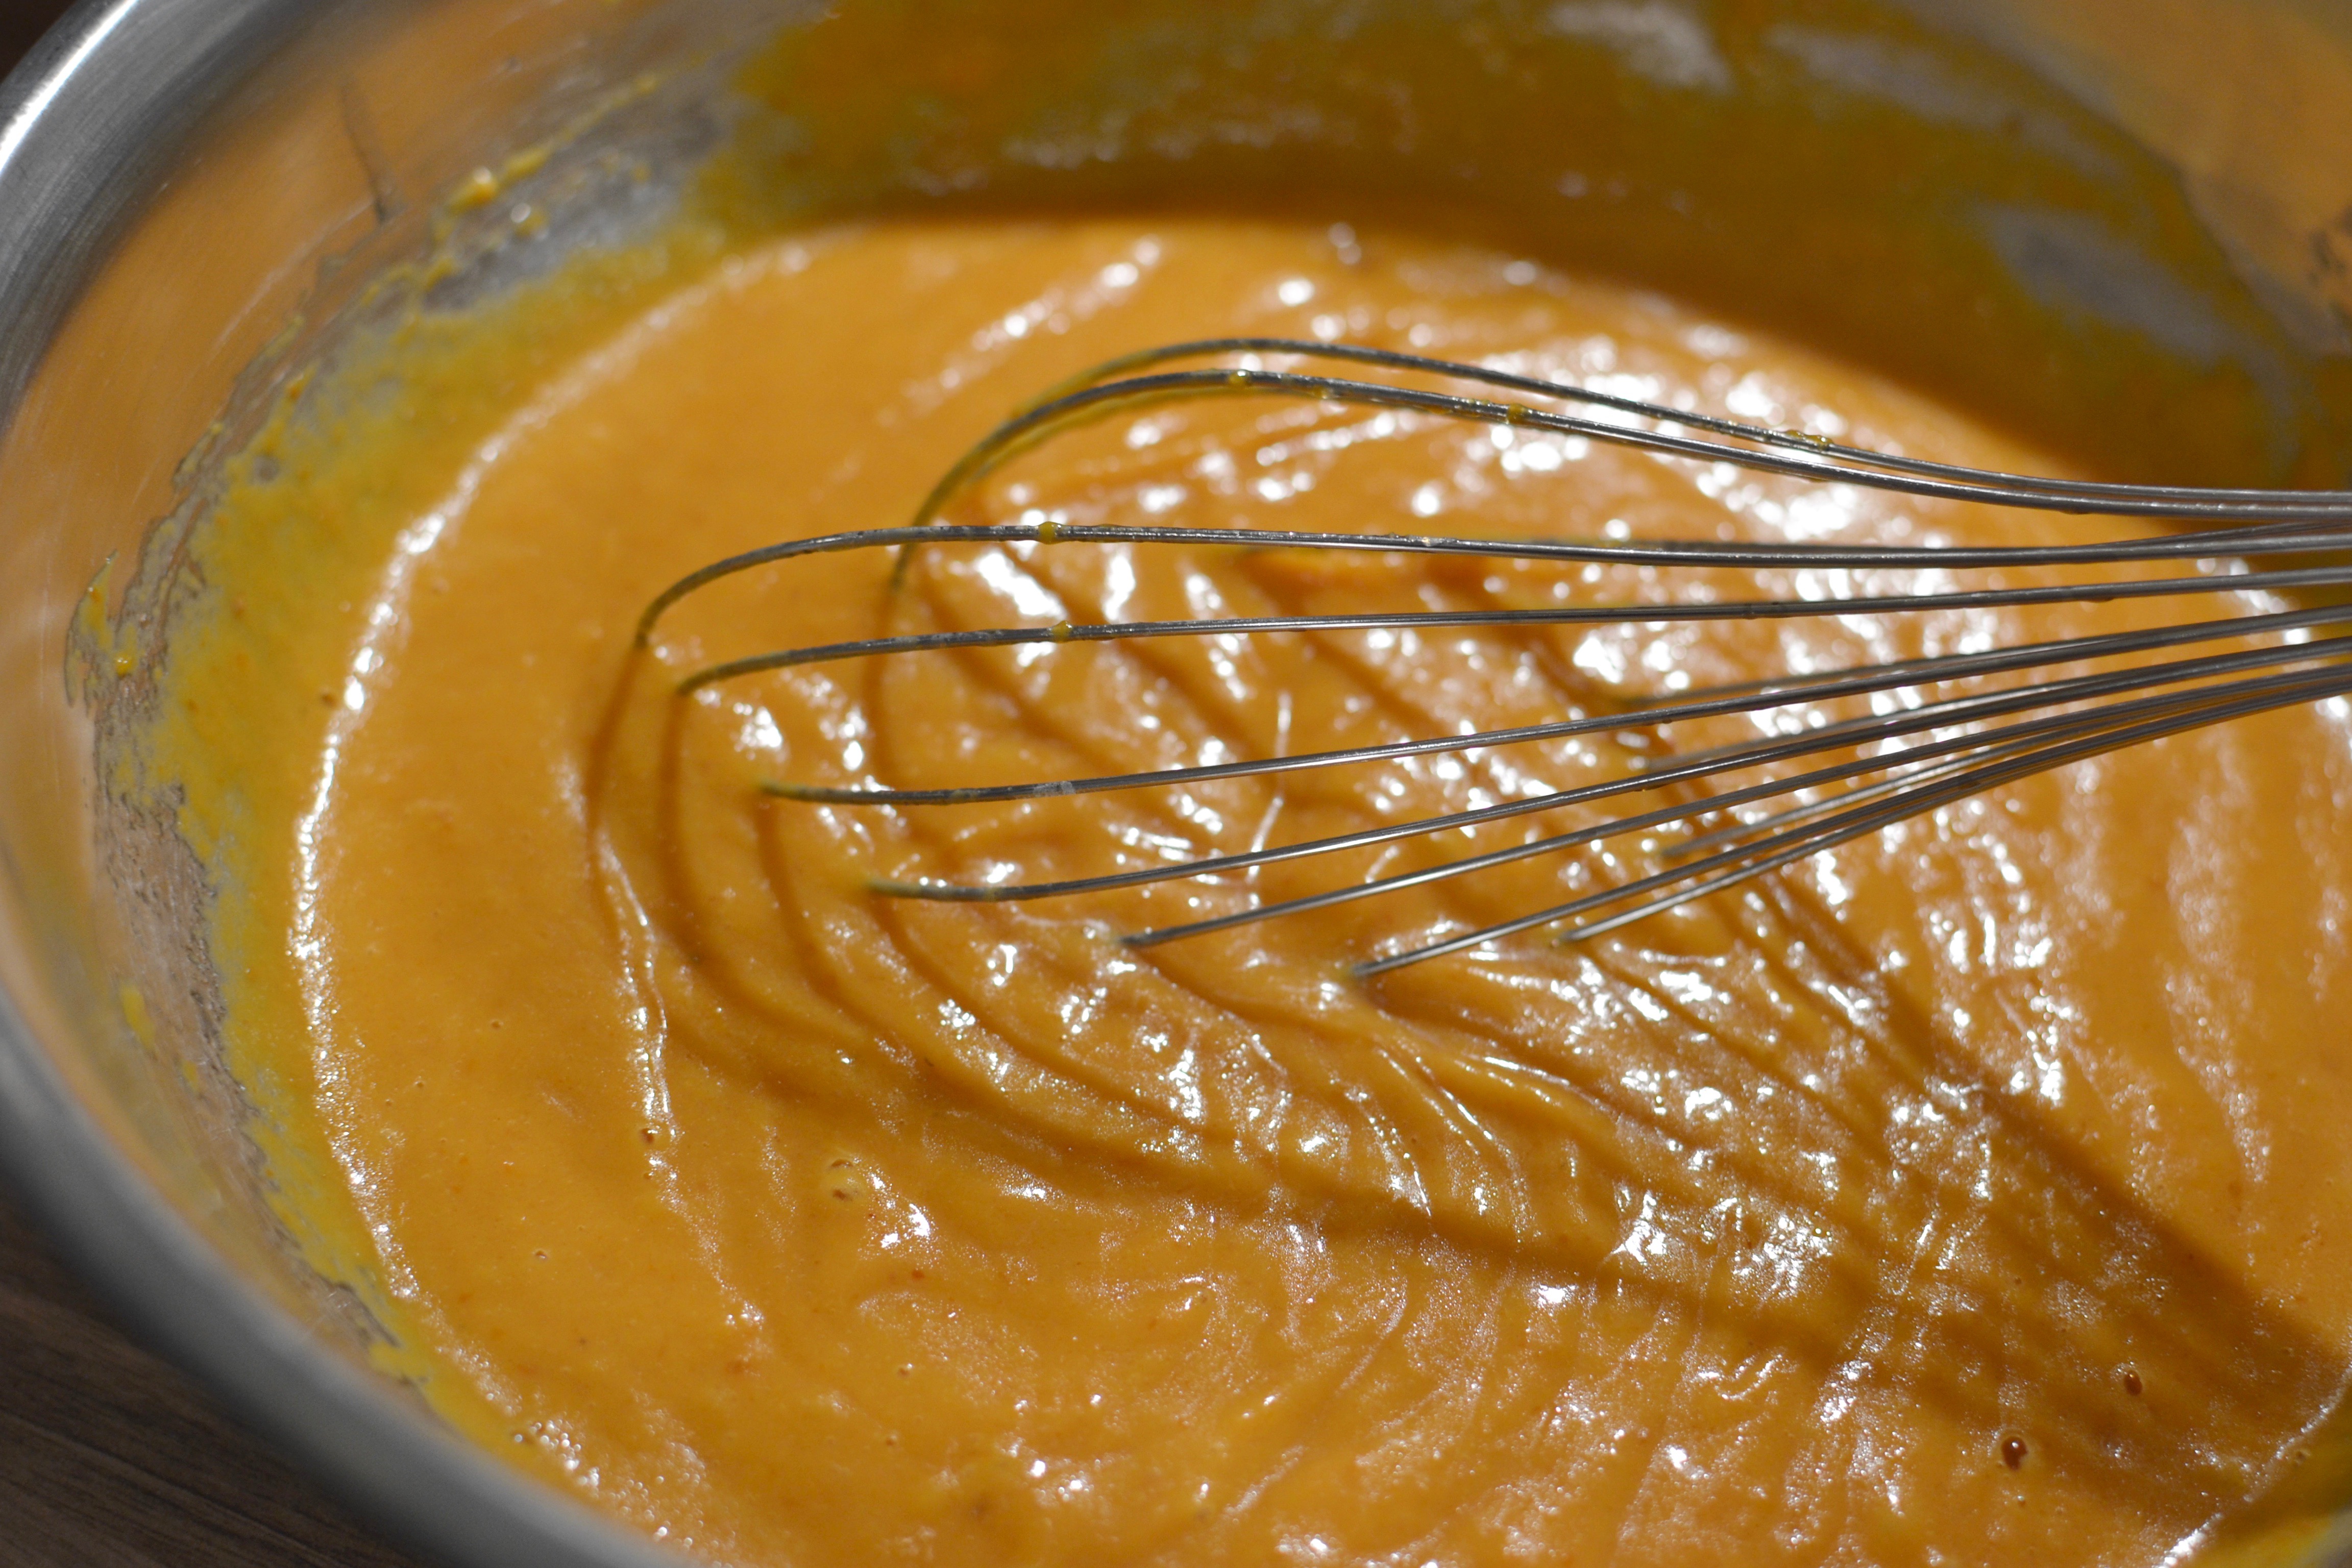
On the subject of curd, I wasn’t sure whether to make a set rhubarb curd similar in texture to many traditional lemon meringue pies, or to go for a softer, oozy version. I decided that I prefer the texture of the soft set curd, so that is what I went for. It does make cutting the pie a little messy but I don’t mind if you don’t.

And a word about equipment: a digital thermometer will enable you to be very accurate when making the Italian Meringue; and a cook’s blow torch, is not only heaps of fun, but gives more precise results when finishing off the meringue than toasting the finished pie under the grill, and then precariously transferring on to a serving platter or cake stand.

First, the pastry:

Pastry Ingredients

330g plain flour

100g icing sugar

180g butter, cubed

3 medium egg yolks

Splash of cold water.

  1. Put the flour, icing sugar and cubed butter in a stand mixer and use the paddle attachment on slow for a few minutes until the contents resemble breadcrumbs.
  2. Add the yolks and start the mixer again, pouring in the water a few drips at a time until it starts to bind together. Stop before you have one big lump of pastry.DSC_0725
  3. Remove from the mixer, gather together into a ball, flatten and wrap in clingfilm and refrigerate for an hour.DSC_0727

Whilst the pastry is chilling you can make the curd.

Rhubarb curd ingredients

400g rhubarb

3 large eggs

170g cubed butter

3tsp Cornflour

150g Caster

(Depending on how much the rhubarb’s pink colour has been lost in the cooking, or if it’s later rhubarb and ended up quite green like mine did, add a wee drop of pink food colouring paste to help it along. Nobody wants to eat something that looks like pea meringue pie.)

Here is the link to the curd recipe. I haven’t written it out as it’s not my recipe, but listed the ingredients so you can get all the ingredients in.

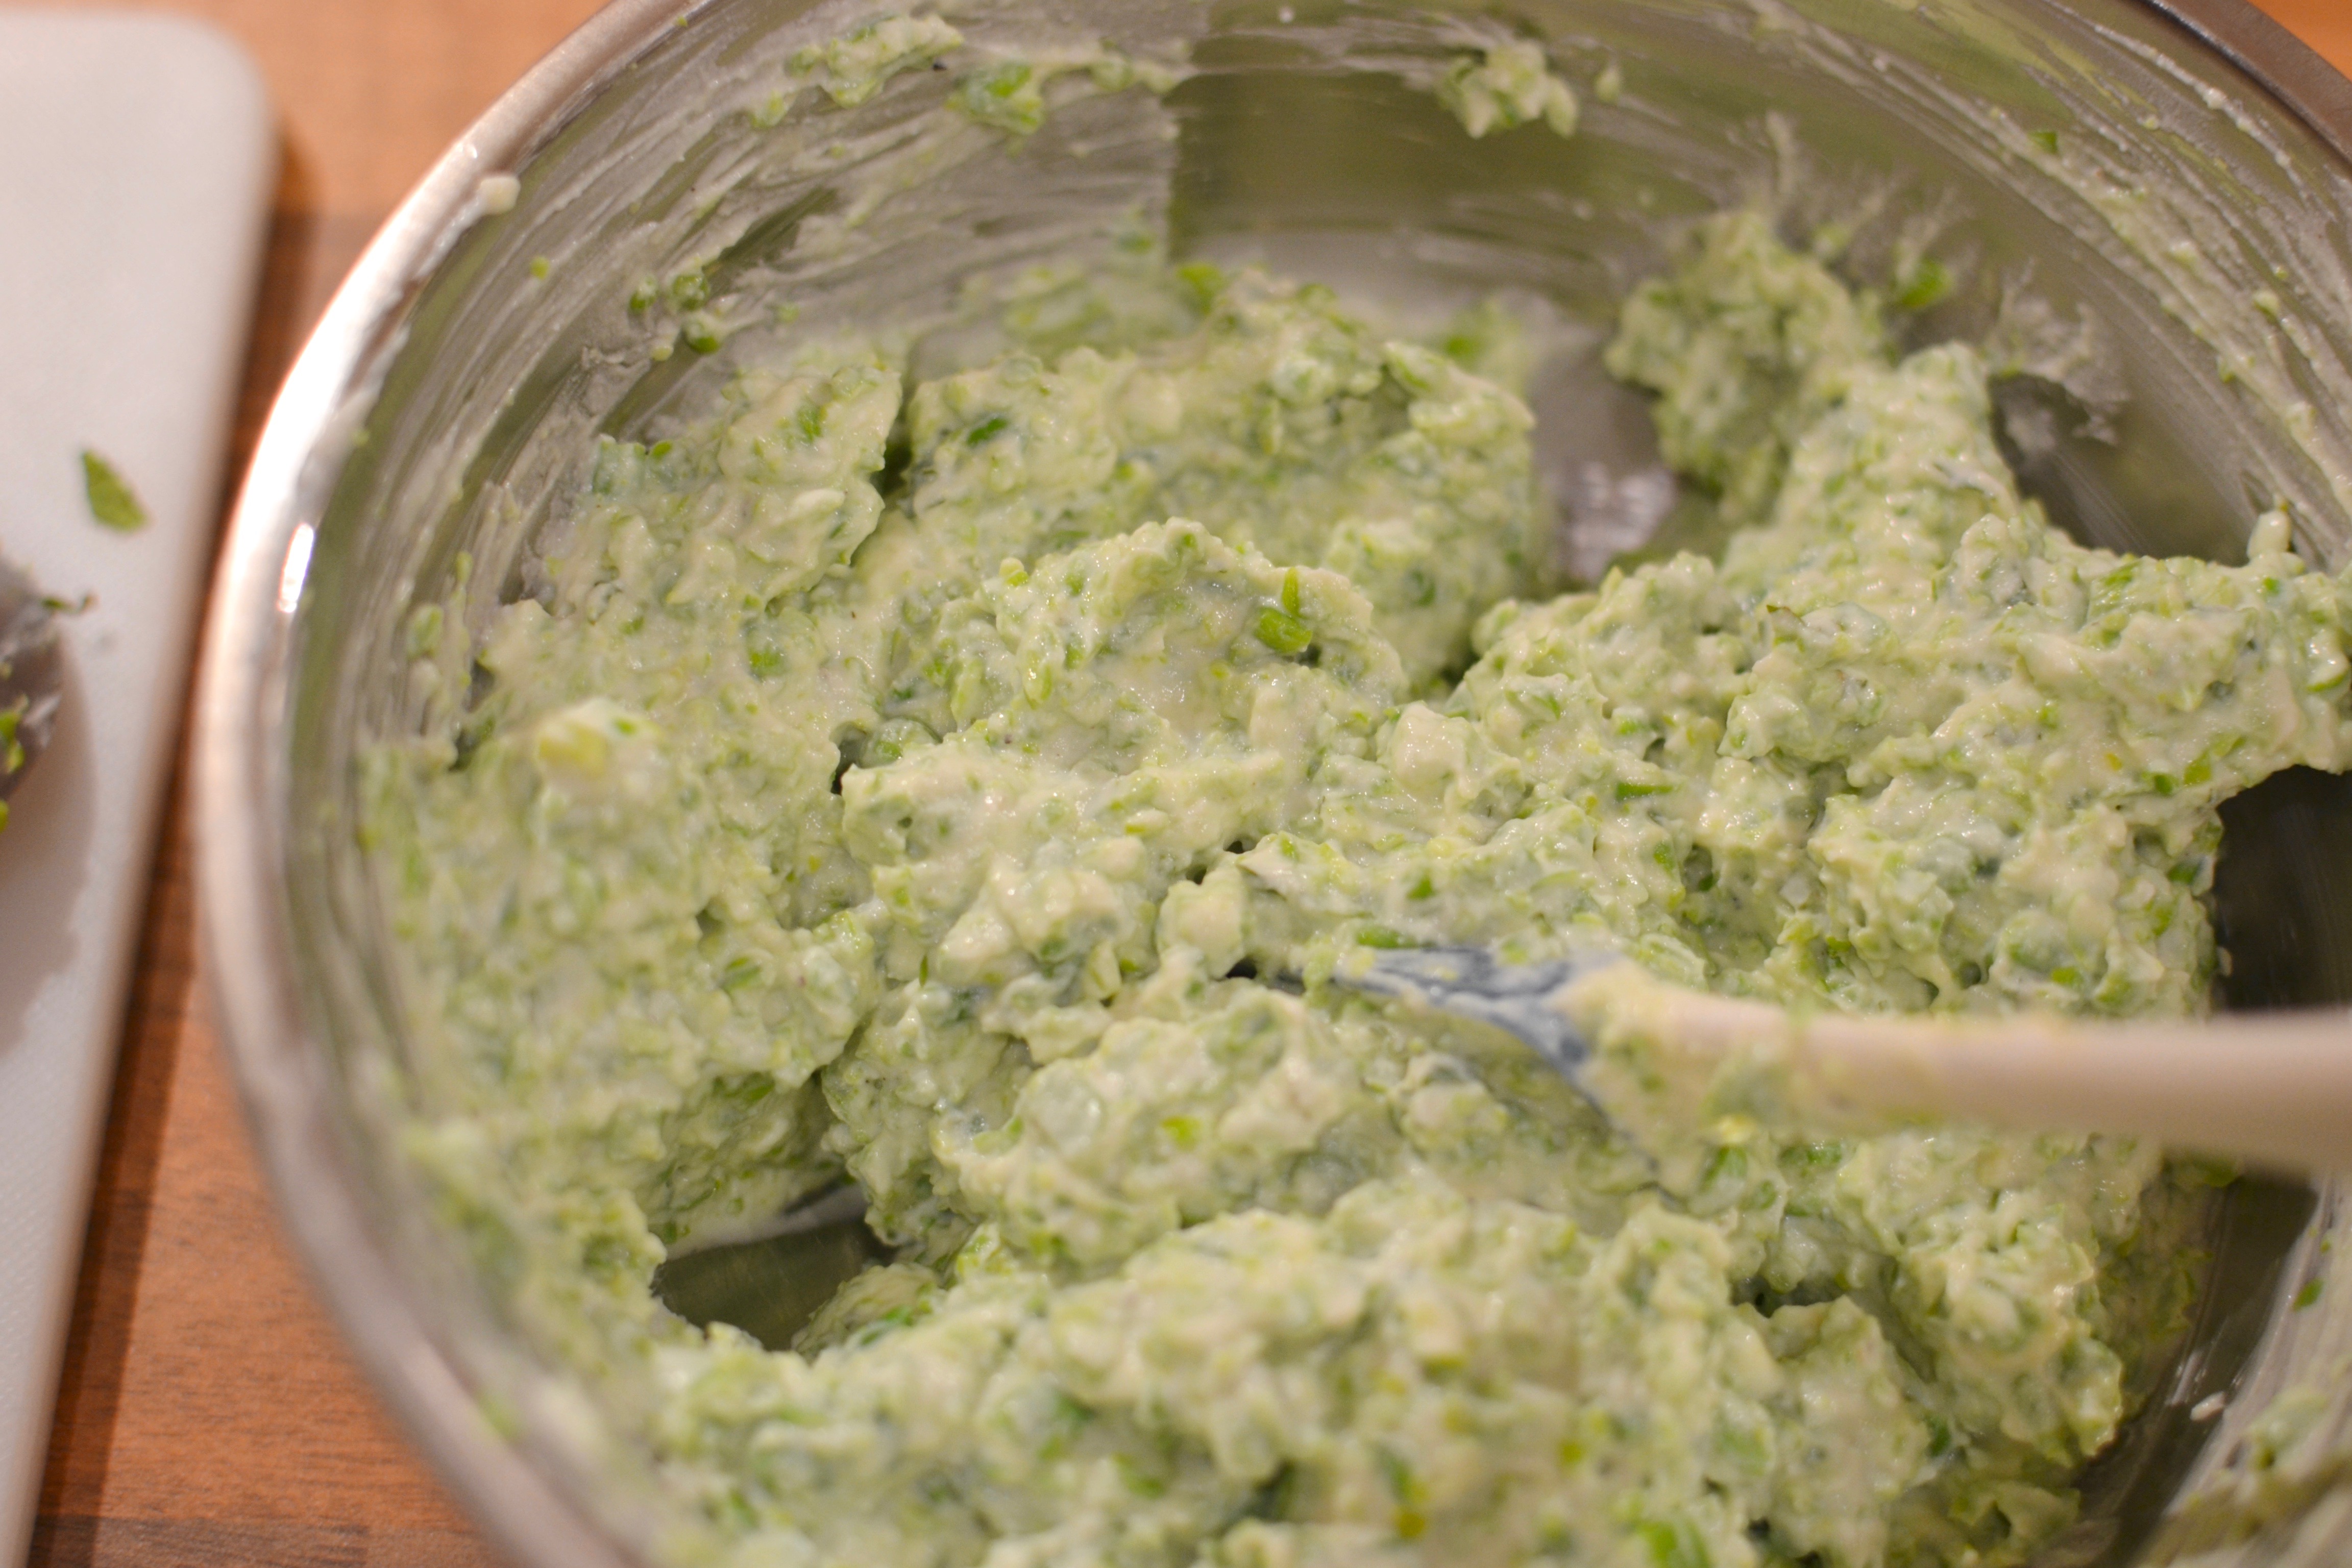
The curd needs to firm up in the fridge for three to four hours. During this time you can make the pastry case.

The pastry recipe makes enough for two 8″ round tart cases. You can freeze the half quantity that you don’t use if well wrapped, and use within a month.

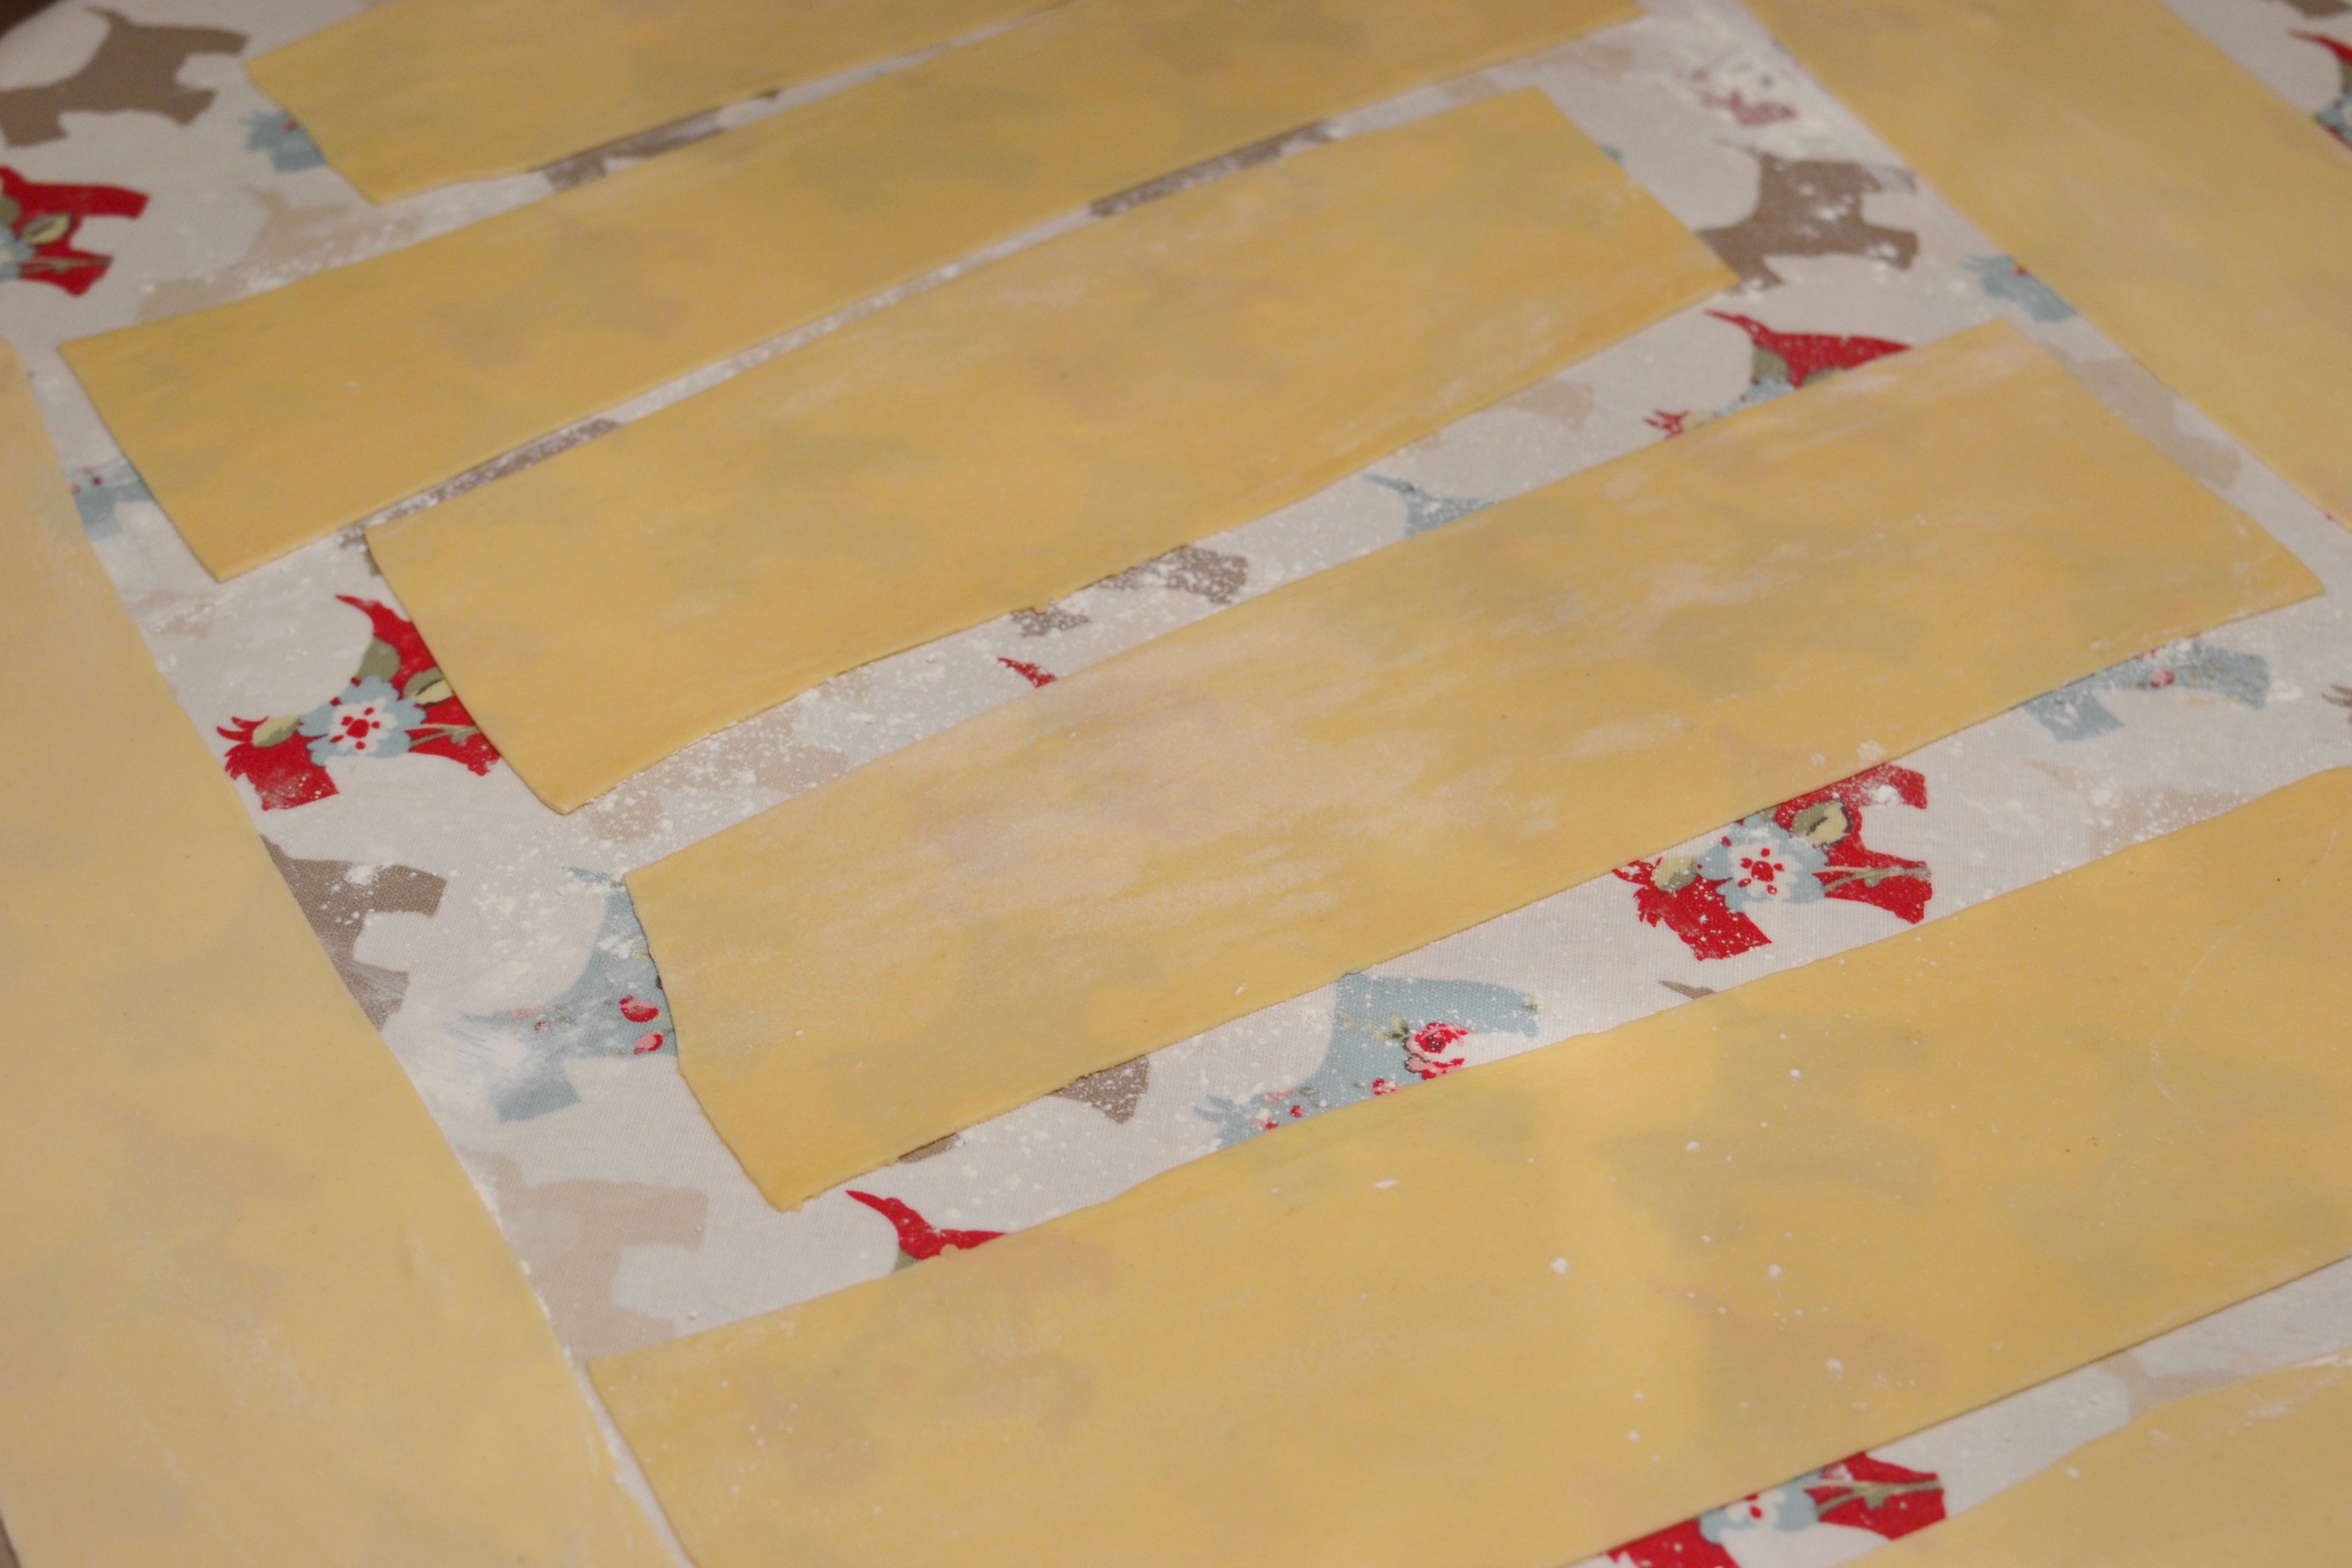
Roll out half of the chilled pastry and line the case, pricking the base with a fork. I always leave a slight overhang because no matter how much I chill my pastry it always shrinks a bit. Return to the fridge for at least half an hour to firm up again.

Bake blind, in a preheated oven 170°c (fan) for ten minutes, then remove the paper and baking beans/rice/whatever you’ve used to weight it down and bake for another 10-15 mins. The pastry should be dry and golden brown.

Allow it to cool in the tart tin then, with a sharp serrated knife, trim any excess.DSC_0753

Once the curd is firm enough to use, spread it out inside the cooled tart case. I recommend doing this in its final resting place as it may not like being moved once full of curd.DSC_0772

Now for the Italian meringue. You will need a digital thermometer.

Italian Meringue Ingredients

3 egg whites

180g caster sugar

65g water

1/2 teaspoon good vanilla extract 

  1. Put the sugar and water in a pan and warm and gently warm until the sugar dissolves. Try to resist stirring the syrup as this can encourage sugar crystals to form on the sides of the pan.
  2. Whilst the sugar is dissolving whisk the egg whites slowly to a very soft peak.
  3. Allow the sugar syrup to reach 120C. This will take a few minutes. When it almost there whisk the egg whites a little more so that they are firmer but not stiff.DSC_0755
  4. Once the syrup has reached 120C steadily pour in a thin stream to the egg whites whilst still whisking, until all of the syrup is used up. Then keep the whisk going until the meringue and the bowl are cool again. This can take 10-15 minutes.
  5. Whisk through the vanilla extract.

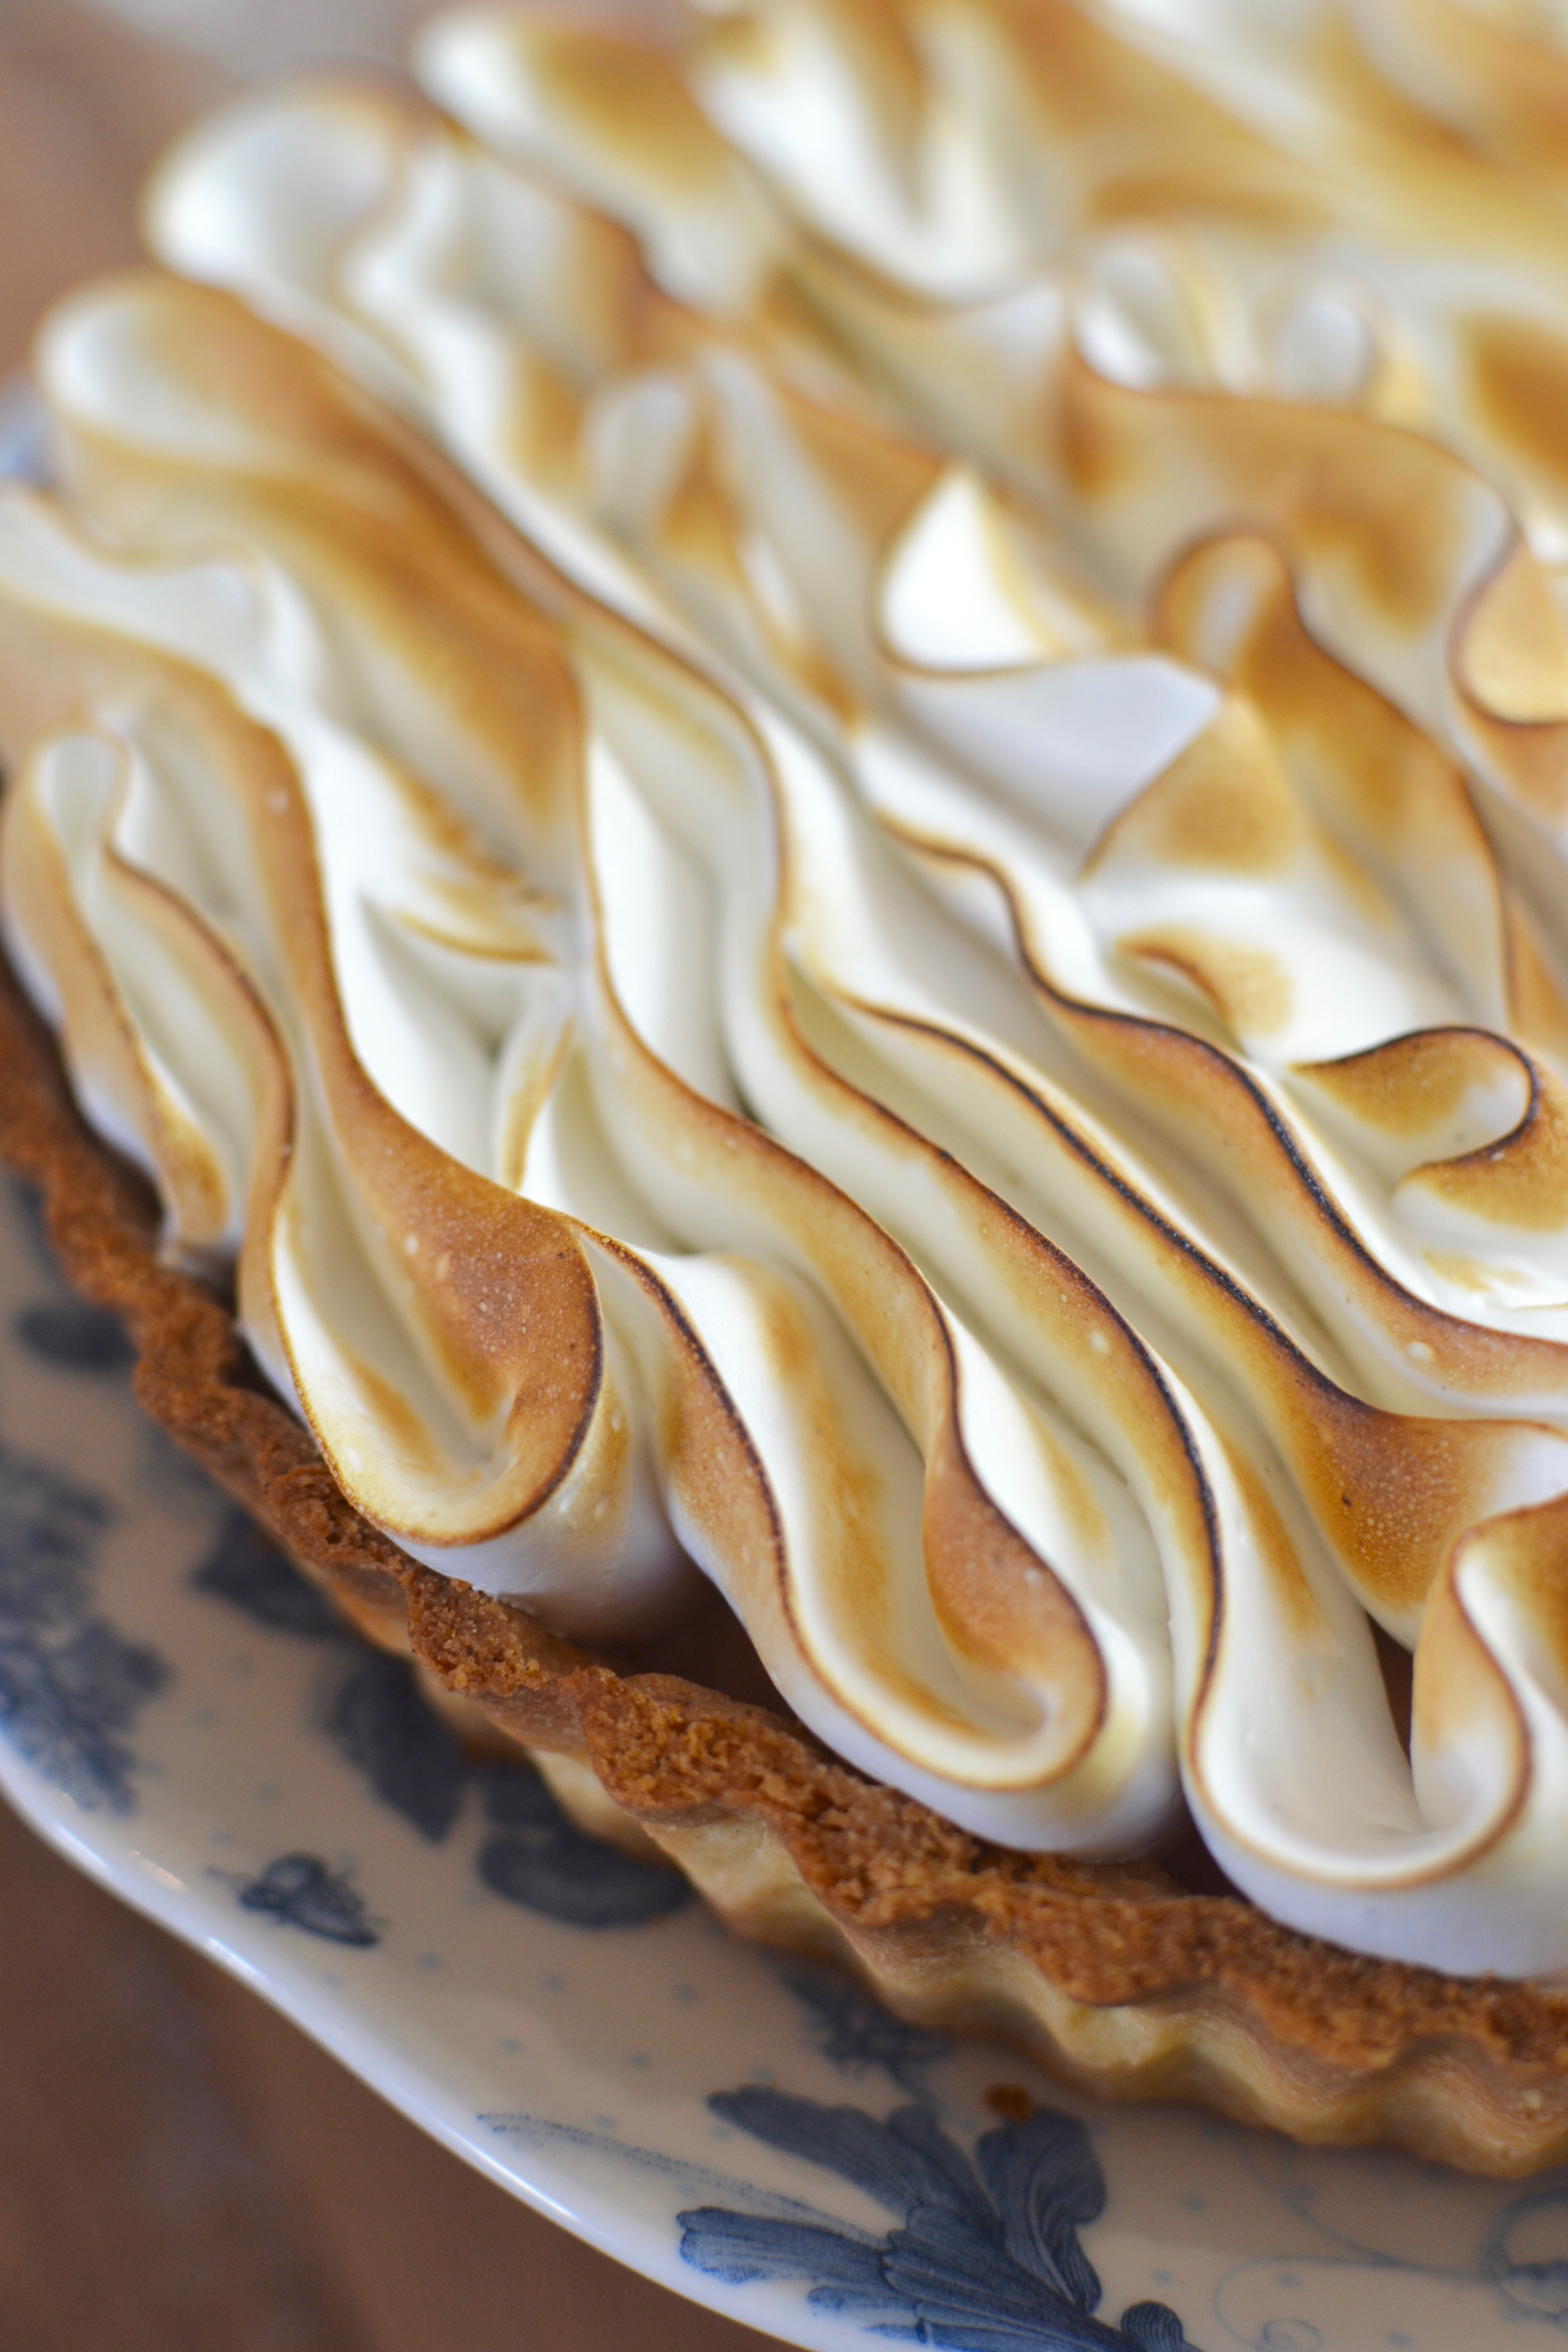
Now, you can pile the Italian Meringue on to the crust and curd in any way you like. You can pile it up with a spoon or spatula, create hedgehog spikes, or try out various piping techniques like piped roses or shells…the choice is yours.

I went for ruffles so I could have maximum fun with my blow torch, and this is the piping nozzle that I used. In hindsight, I should have made them even more flamboyant!

Whatever you do, have fun, and don’t worry about it too much. Nobody is going to complain once they bite in to that sweet, toasted meringue mixed with unctuous, rhubarby curd and crisp, pastry.

Toast the Italian Meringue with your blow torch, if you have one. Of course, the meringue is already cooked because of the hot sugar syrup, but it looks and tastes so much better toasted.

DSC_0779

So, I hope that you have a go at making the tart and enjoy eating it even more. You could make individual tartlets if you fancy, or make the tart a different shape. Embrace the seasonal joy of rhubarb.

DSC_0804


Rhubarb, Almond and Orange cake

Jings! It’s been a very long a time since I wrote a blog post. Last year, I got a double dose of shingles and have spent the last few months slowly recovery from the after effects. I have also had to take a break from my baking business, The Stonehouse Bakery. But, recently, I have started to bake for my family and have come up with a recipe using the ‘just in season’ forced rhubarb.

It’s a moist cake with a streusel topping that is delicious on its own or with cream or custard and a great way to enjoy rhubarb whilst it’s in season. The citrus and almond flavours and moist texture develop after a day, so it’s a good cake for making a day in advance, as long as you keep it covered in an airtight container.

Ingredients:

175g soft butter

175g caster sugar

3 medium eggs

2 oranges, zest only

100g self raising flour

75g ground almonds

250-300g rhubarb, chopped into 2cm lengths 

1/2 teaspoon vanilla extract

1/2 teaspoon almond extract


Streusel topping:

50g flour

20g butter

20g sugar

30g ground almonds

Zest of one orange

50g flaked almonds

Method:

  1. Line an 8″ or 9″ springform round baking tin. Preheat oven to 160° C fan.
  2. Cream the butter and sugar with the zest from two oranges until light and fluffy.
  3. Add the vanilla and almond extracts and mix again.
  4. Weigh out the flour and ground almonds and stir together
  5. Add the eggs to the butter and sugar mixture, one egg at a time, with addition of a dessert spoon of the flour and almond mixture with each egg. Mix thoroughly between additions.
  6. Fold in the remaining flour and almond mixture.
  7. Put the batter in the baking tin and spread evenly.
  8. Place the chopped rhubarb over the surface of the cake batter, trying to leave a half cm gap from the edges.
  9. In a separate bowl, rub together the flour, ground almonds, sugar and butter to form breadcrumbs. Stir through the zest of one orange and the flaked almonds. 
  10. Sprinkle the streusel topping over the rhubarb then bake for 50-60 minutes until the cake feels firm. You may need to cover the streusel topping with some foil to stop it colouring too much, so check on the cake after 40 minutes.
  11. Allow to cool for 10 minutes in the tin, then release the springform and allow the cake to finish cooling, though you might enjoy it warm with custard.
  • I hope that you enjoy this seasonal cake.
  • Pistachio and Cherry Tiffin

    DSC_0132 (1).jpg

    I won’t insult your intelligence by suggesting that this is some great bake, or indeed, a new idea. I got the inspiration from a coffee chain’s pistachio and amaretti tiffin, but decided to recreate it with my own additions.

    As with all tiffin, it is very, very simple and a (excluding the amaretto soaked cherries) great thing to make with the kids.

    It would also make a lovely Christmas gift or addition to serve with coffee at the end of a meal.

    DSC_0121 (1)

    Ingredients:

    100g Dried Cherries (chopped roughly)

    40ml of Amaretto

    225g Butter

    45g Golden Syrup

    50g Cocoa Powder

    250g Amaretti

    50g Pistachios, chopped

    200g Milk Chocolate

    100g Dark Chocolate

    Extra Pistachios, freeze Dried Cherries or sprinkles to decorate.

    1. Begin a day or two before you want to make the tiffin by soaking the dried cherries in the amaretto. The cherries will plump up and taste delicious.DSC_0122
    2. Line an 8′ square baking tray.
    3. Melt the butter and golden syrup in a saucepan over a gentle heat.DSC_0123
    4. Crush the amaretti biscuits fairly finely, then stir through the chopped pistachios and cocoa powder.DSC_0124
    5. Once the butter and golden syrup have melted, add the soaked cherries to the mixture then tip it in with the crushed biscuit mixture and stir well.
    6. Put it into the prepared tin, spreading it out evenly and pressing down to form a fairly smooth surface. Allow to firm up.DSC_0122 (1)
    7. Once the tiffin is firm, melt the milk and dark chocolate and spread evenly over it. Sprinkle finely chopped pistachios and freeze dried cherries on top. I happened to have the cherries, and wouldn’t buy them especially for this: red sprinkles would be just as effective.

    I took some in to work and everyone thought it was a very decadent and grown up tiffin. I  hope that you try it over the festive period and enjoy it too.

    DSC_0131

    Chocolate and Hazelnut Torte

    DSC_0138.jpg

    This is a recipe that I have adapted from one of my favourites from delicious magazine. After the first time that I made it I switched the chocolate ganache for whipped cream on top, which I felt balanced the dark chocolate of the cake better still. I also crush amaretti biscuits and scattered them over the top also.


    Then recently I had the idea of making it with hazelnuts and Frangelico instead of almonds and Amaretto. It worked very well, but it could easily be adapted for whatever alcohol you prefer. I think Marsala would be especially delicious and would be a nod to Tiramisu, especially if you folded some mascarpone through the cream and dusted the whole thing with cocoa powder.

    Ingredients:

    200g Of Butter

    200g of Dark Chocolate

    150g of Ground Hazelnuts

    6 Medium Eggs

    180g of Caster Sugar

    50ml of Frangelico liqueur

    To finish:

    300g Double Cream

    30g of Icing Sugar

    30ml of Frangelico

    1 Teaspoon of Vanilla

    40g of Roughly Chopped Hazelnuts

    (any kind of other decoration you fancy, perhaps gold sugar or sprinkles. I grated about 25g of Dark Chocolate over mine)

    1. Preheat your oven to 160C and grease and line a 9″ springform making tin.DSC_0102
    2. Melt the butter and chocolate slowly over a bain marie.
    3. Meanwhile, eparate the egg whites and yolks.
    4. Whisk the egg yolks with the caster sugar until thick and pale.
    5. Once the chocolate and butter have melted add the Frangelico and stir in the ground hazelnuts. Allow this mixture to sit to cool a little for 5 minutes.
    6. Whisk the egg whites in a separate bowl until firm and stiff.
    7. Add the chocolate mixture to the egg yolk and sugar mixture and fold until completely blended.
    8. Take a large spoonful of the stiff egg whites and use it to slacken the chocolate and egg yolk mixture. Then add the rest of the egg whites and fold until incorporated, being gentle to ensure that as much air is maintained as possible.DSC_0126
    9. The mixture will be very loose. Pour it into the prepared tin and bake in the oven for 35-40 minutes. It will rise up and crack (don’t worry) and is ready when a skewer comes out clean.DSC_0127
    10. Allow it to cool in the tin for 20 minutes before unclipping the springform sides. Allow to cool completely before finishing off with the cream.DSC_0132
    11. To make the cream, put the cream, vanilla and Frangelico in a bowl, sieve the icing sugar on top, then whisk the whole lot together until it is firm and holds its shape. If you want to pipe the cream you may want to whisk a little firmer but don’t go too far.
    12. Cover the cooled cake with the cream then scatter the chopped hazelnuts, grated chocolate and any other decorations that you wish.

    IMG_8838

    This is a moist cake and an excellent after dinner desert. It is pretty grown up in its flavours (though my kids like it!) and you can always substitute the alcohol for flavourings or flavoured syrup. It keeps well if kept covered and cool for two or three days. And, without the use of flour, it’s gluten free, so a great option for a dinner party dessert if someone can’t tolerate gluten amongst the party.

    DSC_0142.jpg

    And if you like cherries…use ground almonds in the cake, kirsch as your alcohol, grate hunks of dark chocolate on top of the cream, then spoon cherries soaked in kirsch onto the top just before serving.

    Simple Roast Chicken

    DSC_0139 (2)

    This isn’t so much a post about how to roast a chicken, though I will say how I go about it: it’s more of a post about how living in the countryside has brought me closer to farmers and food producers and the impact it’s had upon how I shop and cook. This proximity, and the friendliness and welcome of these hard working families, has made me more interested in the food I buy, cook and feed to my children. It has made me want to see where the meat comes from; to see how the animals live; and to build relationships with the people responsible for them.

    This is the first of two posts about the people that I have met since moving to our village, and a bigger step into blogging about something other than baking. I have previously touched upon enjoying the fruits of our new garden (rhubarb, apples, blackberries and plums) and our local hedgerows (namely my foray into Elderflower Cordial production and its use in my Elderflower and Strawberry summer celebration cake) so it is no surprise that I have embraced other local produce.

    I knew of St Brides Poultry through friends in the restaurant industry. Their slowly grown and completely free range chickens, guinea fowl and turkeys are sought after by some of the UK’s best chefs and feature on the menu of Michelin star restaurants, including Restaurant Andrew Fairlie in Gleneagles, Perthshire. As it happens, the farm is only a few miles from our new home in Stonehouse, Lanarkshire. Although they mostly supply to restaurants, Aj and Robert give locals a chance to buy their birds once a month, and the opportunity to order turkeys for Christmas each year.

    FullSizeRender

    I was very keen to try their chicken, but I also wanted to visit the farm to see the birds and to find out how their farming methods differed from the ghastly mass farming methods as highlighted by the likes of Hugh Fearnley-Whittingstall in recent years.

    I got in touch with AJ and asked if I could have a quick visit. She immediately said yes and we arranged a suitable time. I went off with shortbread in hand as a way of thanks for taking the time to show around someone who was a very keen but amateur cook.

    Both AJ and Robert gave me a very warm welcome,  inviting me in for coffee before heading out to the see the farm itself. They explained their background in sourcing and selling luxury and quality produce for the industry before deciding to set up the farm to focus on rearing slowly grown, one hundred percent free range, and carefully cared for poultry.

    I think Robert does a far better job explaining what they are all about in this short video. You can see and hear their passion and commitment.

    Robert explains their story.

    As for our Sunday roast, well, let’s just say the kids and I all thought it was the best roast chicken we had ever tasted.

    DSC_0122 (2)

    I inserted a split clove of garlic and some butter under the skin of each breast, slathered on some more butter and sea salt and whacked it in the oven, upside down (like my Grandma used to do, and, incidentally, how Aj recommends you roast their chickens), at 200C for about 20 minutes, then turned it down to 180C for a further 40 minutes. During cooking I basted it with the butter and juices, and turned it breast up for the last 20 minutes to ensure a good crisp skin and juicy meat throughout. I also allowed the roasted chicken to rest for about 15 minutes, covered in foil, whilst I used the cooking juices and the water from the vegetables to make a gravy.

    DSC_0136 (1)

    I served the chicken with some roasted potatoes and celeriac, and some rainbow carrots. I wanted to keep things simple so that we would focus on the taste of the chicken.

    DSC_0146

    After dinner I boiled the carcass and made the most flavoursome and delicious chicken soup. What surprised me most was how gelatinous the chicken stock was, and how much it actually tasted of chicken. Supermarket chickens don’t make stock that taste of anything. AJ explained that because their birds are allowed to grow slowly and mature, slaughtered weeks later than mass produced chickens, they have time to develop not only an amazing taste but some bone marrow.

    DSC_0151 (1)

    A chicken from St Brides Poultry will cost you about £10 and is a few pounds more expensive than a supermarket bird, but, my goodness, do you taste the difference. Personally, I think it is worth every penny. I also think that when food tastes this good, you are happy to eat perhaps a slightly smaller portion but savour the taste even more.

    Furthermore, it was so very lovely to meet Robert and AJ. Theirs is a risky and very hard way to make a living, but they do it because they have a passion for excellent produce and want to rear the best tasting poultry in the UK. I hope that they continue to grow in the direction that they need to (you can find out more about their new Crowdfunded Campaign).

    And for clarity, all of this does not mean that I don’t use a supermarket. I have three growing children to feed, and the supermarket offers the choice and affordability that most people rely on these days. But, building these friendship and making the choice to spent a few extra pounds on quality and ethically reared meat and fresh produce (that is also local) when I can, is so rewarding on many levels. Maybe one day,  my bread and cakes will be part of this thriving local food producer economy and community.

    Pumpkin, Apple and Pecan Bundt

    DSC_0121

    It’s that time of year again when I get obsessed with all things autumnal, and, in terms of baking, I love spices like cinnamon, ginger and cardamom, and to use apples, pears, and nuts as key ingredients. Of course, I have succumbed to the American invasion of pumpkin, and love to bake with it during the months leading up to Christmas.

    It used to be near impossible to get canned pumpkin in the UK, but it is slowly becoming easier to find. When I do find it, however, I tend to stock up, just in case.

    IMG_7861.jpg

    I decided to make another bundt cake recipe that I could top with another favourite ingredients of mine, maple butter. If you cannot get any, simple make an icing with equal parts maple syrup and icing sugar.

    So, this is a *big* cake. Don’t make it for just you and your friend having coffee together. I used a large bundt tin. I suppose you could half all of the ingredients and make it in a smaller bundt tin, a regular tin, or even a large loaf tin (or two.) It’s also a cake to have with coffee rather than a gooey, squidgey dessert type of cake, if you know what I mean.

    It is a super easy method, using ideas cobbled together from various pumpkin cakes that I’ve tried in the past. I found that the flavours develop and the texture improves when eaten the day after.

    Ingredients

    1 Can of Pumpkin puree (about 400g if you are making your own, fresh)

    4 Eggs

    4 Teaspoons of Pumpkin Pie Spice

    2 Teaspoons of Bicarbonate of Soda

    400g of Plain Flour

    400g of Caster Sugar

    1 1/2 Teaspoons of Salt

    2 Teaspoons of Vanilla Extract

    240g Vegetable Oil

    100g Pecans

    4 Apples

    To Decorate:

    150g of Moose Maple Butter

    150g Icing Sugar

    Pumpkin Seeds (I dusted mine with gold lustre)

    1. Preheat the oven to 180C (160C fan).DSC_0124 (1).jpg
    2. Mix most of the dry ingredients together in a large bowl: the plain flour, bicarbonate of soda, pumpkin pie spice, and salt. Remove 70g of this dry mixture and place in a smaller bowl (to coat the chopped apples with) and leave the remaining to one side.DSC_0127 (1)
    3. Now whisk together the can of pumpkin purée, the oil, the eggs, and the vanilla in a another large bowl. Then mix through the caster sugar.DSC_0130 (2).jpg
    4. Peel, core and chop the apples. Put them in the bowl of 70g of flour mixture and toss them until they are completely coated.
    5. Chop the pecans, keeping them quite large.
    6. Add the dry to the wet ingredients and whisk until completely incorporated.DSC_0139 (1)
    7. Fold in the apples and pecans.
    8. Pour into a prepared large bundt tin and bake for about 50 minutes. It will rise slightly above the sides of the tin but should not spill over.DSC_0140
    9. Allow to cool for 5 minutes in the tin then turn out to cool completely.IMG_7920 (1)
    10. Make the icing by melting the Moose Maple Butter then whisk in the icing sugar until you have a smooth, fluid icing. Pour over the cooled cake and scatter with pumpkin seeds (or chopped pecans if you prefer.) If you cannot get the butter, then whisk 100g of maple syrup with 100g of icing sugar and use that instead.

    IMG_7944 (1).jpg

    I hope that you enjoy my latest cake and can forgive me for my obsession with all things autumn.

    Pea and Mint Ravioli

    DSC_0178

    If you follow my Instagram account or know me in real life, you will know that my passion goes beyond baking and all things sweet. I love to cook and have done so since I was a child.

    I have decided to share some of my savoury recipes, and here comes the first one.

    Ever since I first made my own pasta a couple of years ago, I (and my kids) have become quite fixated by it. Its texture is like no bought pasta, even the fresh pasta in the supermarket. It is smooth and silky, robust and filling, and deeply satisfying and very fun to make.

    If you have never made your own pasta, then I urge you do so.

    When I saw peas in their pods in the supermarket, it took me back to my childhood when the only peas my grandma ever served where freshly podded, having been bought from the market and brought home in a brown paper bag. I loved to sit at the dining table with her and pop the sweet, green peas from their pods. I quickly bought some and had the idea of pairing them with mint and ricotta in ravioli.

    DSC_0130

    As usual, I got the kids involved and they loved podding the peas too. We also discovered that our puppy loved eating the occasional escaped pea that flew across the kitchen.

    Anyway, I was delighted with how the ravioli turned out, so I made it again, documented the process and wrote up the recipe. I hope that you enjoy it too.

    Ingredients

    250g tub of Ricotta

    8 Mint Leaves, give or take 😉

    15g of freshly grated Parmesan

    500g of fresh peas in their pods (about 180g when out of their pods)

    1 Egg Yolk

    Salt and Pepper

    For the Pasta:

    400g of 00 or Pasta Flour

    4 large Eggs

    1. Firstly, make your pasta by combining the eggs and flour in a bowl, then once you have a scraggy dough, turn it out onto a surface and kneed until smooth and silky.
    2. Wrap in clingfilm and rest in the fridge for half an hour to an hour.
    3. Now to the ravioli filling. Pod your peas and blanch them in boiling water for two minutes, then drain and place in cold water to stop the cooking and cool them rapidly.DSC_0147
    4. Once the peas are cool, blitz them in a blender until they form a rough paste.DSC_0143
    5. Chop the fresh mint.DSC_0144
    6. In a mixing bowl, add the ricotta, the egg yolk, parmesan, pea paste, mint, salt and pepper. Combine all the ingredients.DSC_0150
    7. Chill until ready to use.
    8. Roll out your rested pasta as you normally would. For filled pasta I stop at the second last setting so it is not too thin.DSC_0152
    9. Lay out your strips of pasta, load up your pea and mint filling into a piping bag if you have one (you could use a spoon but I find it easier to pipe the filling), and prepare a small bowl of cooled boiled water and a pastry brush.
    10. Pipe equal quantities of the filling at even spaces along the pasta, then lightly brush between them with water and along the long edge.
    11. Gently fold the pasta over, being careful to push out any air bubbles, then press down gently but firmly between all the fillings, so that you end up with sealed pouches of filled pasta.
    12. Using a knife, pizza wheel, or a ravioli gadget like mine, separate the pouches into individual ravioli and place to one side.DSC_0166 (1).jpg
    13. Keep going until you have used up all of your filling and pasta (you may have to roll out some excess pasta and re-use).DSC_0173 (1)
    14. Boil some salted water in a large pan and gently place the fresh ravioli in to cook. They are cooked when they float to the top and this should take 3-5 minutes. Be careful to move the ravioli gently in the pan so that they do not clump together.

    I served our ravioli with some of the reserved pasta water, some melted butter and more grated parmesan.

    DSC_0174.jpg

    The taste was so fresh and light. It has become a firm favourite in our house: I hope it does in yours too.

    DSC_0172 (1).jpg

    I also served it with this beautiful Grüner Veltliner from Mark and Spencer, which went beautifully. I would love to claim that my wine knowledge is so expert that I paired it myself, but I can’t. Marks and Spencer were selling it with the label recommending it with a pea and mint risotto, so, it jumped off the shelf at me.

    So, as I come to the end of my first savoury post, I feel both excited and a little cheeky. I am excited to share another passion of mine, that I simply have never thought to write down and share before, but also a little worried that people might think me arrogant to share something that I have created myself but have no training in (I have no training in baking either but somehow that feels different.) Of course, I wouldn’t have the experience of making and enjoying pasta if it wasn’t for my Italian mum, Carla Tomasi who gave me so much advice and support when I started on my pasta journey through Instagram and emails.

    So, once again, big thanks and much gratitude to the wonderful friends that I have made through social media around the world. You are all my food heroes.


    White Forest Gateau

    DSC_0027.jpg

    The final cake, though I wouldn’t pipe icing around the top or use fresh cherries next time.

    This is a cake that I adapted from a recipe that I found in delicious. magazine. I made the original a couple of months ago but didn’t care for the icing at all. I decided I wanted to nail a cake with cherry and almond flavours, that featured white chocolate, but it couldn’t be cloying or heavy.

    I also had various visions of how the final cake would be decorated. But I think I made it too fussy and old fashioned on this occasion and would definitely scale back a bit next time. But I thought it would be helpful to include the process to show that it usually takes a few attempts to get to where you want to be.

    Ingredients

    150g of Plain Flour

    50g of Ground Almonds

    2 Teaspoons of Baking Powder

    300g of Caster Sugar

    5 Medium Eggs, separated

    1/2 Teaspoon of Cream of Tartar

    2 Teaspoons of Vanilla Extract

    1 1/2 Teaspoons of Almond Extract

    115g of Vegetable Oil

    250g of good Cherry Jam


    Syrup ( if you don’t want to use alcohol you could make it all water and sugar)

    70g of Sugar

    30g of Water

    40g of Kirsch


    White Chocolate Cream

    450 of Double Cream

    180g of White Chocolate

    90g of Icing Sugar

    Decoration

    30g of Freeze Dried Cherries or Freeze Dried Cherry Powder

    150g of White Chocolate

    Before you start baking it is a good idea to make your white chocolate bark or shards for the sides of the cake. I didn’t execute mine especially well the first time: I didn’t temper the chocolate (naughty Frances!) and left it too thick.

    DSC_0005

    Too thick!

    Melt the 150g of white chocolate (temper it if you can) and spread it out thinly on some sheets of greaseproof paper, then carefully roll it up around a cardboard tube. Allow to cool then pop it in the fridge or freezer.

    Now for the cake:

    1. Grease and line two 8″ deep sided sandwich pans. Preheat the oven to 170C (or 150C fan).
    2. Sieve the flour and baking powder into a large bowl, and stir through the ground almonds and 200g of the caster sugar.
    3. Whisk the egg whites in a clean bowl until foamy, add the cream of tartar, then whisk until soft peaks. Gradually add the remaining 100g of caster sugar as if you are making meringue.
    4. In a separate bowl, whisk the egg yolks until creamy, then add the vanilla and almond extracts and the oil. Mix well.DSC_0020 (1)
    5. Add the egg yolk mix to the dry mix. It will be a thick paste like above.DSC_0024
    6. Add a heaped spoonful of the egg white mixture to loosen the egg yolk mixture (which is very stiff) then fold in the rest of the egg whites.DSC_0025
    7. Divide the mixture between the two baking pans and bake for 30-35 mins until risen, golden and firm.DSC_0007
    8. Allow to cool on a rack for 10 minutes, then remove from their pans and cool completely. They will sink a little in the middle, so don’t worry.

    Make the Kirsch syrup whilst the cakes are cooling.

    1. Put the sugar, water and kirsch in a saucepan on a low heat and stir until the sugar dissolves. Allow to cool.DSC_0012
    2. When the cakes have completely cooled, level their tops and pour the syrup over both of them.

    Now make the White Chocolate Cream.

    1. Carefully melt the white chocolate in a bain marie.
    2. Sieve the icing sugar into the double cream and whip until very soft peaks.
    3. Pour the melted white chocolate into the whipped double cream and whip again. Be very careful not to over whip. You want firm peaks but not dry or split.

    DSC_0016

    Spread the cherry jam over one of the cakes, followed by a good layer (about 1cm thick) of the icing. Place the other cake on top, cut side down. Now cover the cake gently (to avoid getting crumbs through the icing) and evenly all over.

    DSC_0004

    If using freeze dried cherry pieces, put them in a food processor and whizz up until they are like dust. Sprinkle this through a sieve on the top of the cake.

    Unwrap the cold or frozen white chocolate. It will break into shards. Press the sides into the side of the cake until it is covered.

    As you can see from my top photograph, I piped icing and placed fresh cherries on the cake. Next time, I will leave it with the freeze dried cherries and white chocolate shards, but you can choose whatever way you want to decorate, and I appreciate that you may not want to order some freeze dried cherries for a one off. You may not even want to bother with the white chocolate on the side (or buy some ready made white chocolate shavings.) If so, don’t worry, you will still get the chocolate flavour through the white chocolate cream. The cake would also look beautiful with just the icing and a few piped rosettes and fresh cherries. Or if you wanted some crunch, some slivers of almonds pressed around the sides would also be delicious and pretty.

    DSC_0022

    I should have stopped here! Less is often more in my book.

    Keep the cake cool until you are ready to serve because of the fresh cream, but it will still be enjoyable after a night in the fridge if it doesn’t all get eaten on the day it’s made.

    Cherry & Almond Squares

    DSC_0015 (1).jpg

    I can’t take much credit for this recipe: it is based on an old favourite of mine from BBC Good Food magazine, Blackberry and Coconut Squares. I did reduce the amount of sugar and change the flavourings, however.

    DSC_0007

    It came about because I saw a large carton of fresh cherries reduced at the supermarket and decided to buy them and give the recipe a new twist. I find with fruity recipes, that I like to alter them according to the season and what’s easily available.

    Ingredients:

    250g of Self Raising Flour

    25g of Oats

    230g of Light Brown Sugar

    200g of Cold Butter, cubed

    30g of Ground Almonds

    300g Fresh Cherries, stoned and halved

    2 Medium Eggs

    1/2 Teaspoon of Almond Extract

    50g of Flaked Almonds

    1. Preheat oven to 180C (160C fan oven) and line an 8″ square baking tin.DSC_0009 (1)
    2. Put the flour, oats, sugar and butter in a large bowl and rub together until it resembles breadcrumbs.
    3. Mix through the ground almonds.DSC_0011
    4. Weigh out 150g of this breadcrumb mixture in a separate bowl and add the flaked almonds to it, and mix through again.
    5. Break the eggs into a bowl and add the almond extract. Beat the eggs lightly.DSC_0014
    6. Add the egg mixture to the remaining breadcrumbs mixture and stir through. It will be a thick and sticky batter.DSC_0015
    7. Put the batter into the lined baking tin and spread it as evenly as you can.DSC_0019
    8. Spread the prepared fresh cherries over the batter, pressing a few in.
    9. Spread the breadcrumb and flaked almond mixture over the cherries, clumping some of it in your hand as you go.DSC_0021
    10. Bake in the oven for about an hour until the top is golden and crunchy and the inside firm. If the top looks as though it is going to burn, cover loosely with foil.DSC_0008 (2)
    11. Remove from the oven and allow to cool if you wish to cut it into tidy squares or serve warm with custard, cream or ice-cream as dessert.

    DSC_0024

    I am already thinking of how I can adapt this for orchard fruits in the autumn, with plums and cinnamon a firm favourite.

    I hope you enjoy this summery traybake.